Blog – Research Habits I Wish I’d Started Earlier in My PhD
There are about 1001 articles and blogs out there about all the things people wish they had known about doing a PhD before they started. These are filled with advice like pacing yourself, embracing failure, dealing with perfectionism, managing the ups and downs, etc. These are good and useful, but they have been written plenty of times, so this is NOT one of those articles.
My goal here is to list several practical, “lab hack” ideas and productivity pointers that are mostly systems that you can and should implement from the very start of your PhD (or whatever other major research project you are embarking on, e.g. a postdoc or master’s research project) that will make your life way easier along the way. A lot of these are data management and record-keeping tips, since a PhD is likely be far the longest project you will have embarked on, and you will need to have a good system that takes you through the whole thing and is useful to you at the end when you can’t easily remember what you did 2-3 years ago.
There are also some mindsets that I think are worth implementing as early as possible, which will constitute part 2 of this blog. Some of these things I wish I had done from the start, some of these things I managed to do and remain incredibly grateful to my past self for. Let me know what you think! I include some cell culture specific advice at the end since this was the bulk of my actual work, but the rest of the advice is highly generalisable I think. These systems are worth spending the time putting in place from the beginning – they will save you time and stress as you go and by the end they’ll be habitual.
- Have a consistent experiment numbering system that you also use for your file numbering system
This is extremely boring advice, but it is by far the best decision I made early in my PhD and the most frequently envied. It does not really matter what the system is, as long as it is simple, chronological, and used consistently.
For my purposes, this meant that every experiment I did, I numbered, and labelled all associated files starting with that number, going chronologically, starting with 001. What you define as a discrete experiment is mostly up to you; for me, it was typically a coherent idea that I was testing from a given differentiation of cells, or single thing that I was making. For example, using a single differentiation of neurons to do some calcium assays, neurite outgrowth, and lysosomal assays would have constituted three different experiments, or expanding a cell line to generate new stocks would have constituted one experiment.
 Many people start their file numbering with a Year_Month_Date format, but this can be annoying for two reasons – firstly, it doesn’t differentiate your files from everyone else’s in big communal databases (like all the files on a common piece of lab equipment), and it doesn’t nicely separate experiments that you might be running simultaneously.
You might put your initials at the start of your file numbering to make sure that your files are distinct from anyone else sharing equipment, and you can and should incorporate a date into the file name, too, but starting with a chronologically applied number (or number following consistent initials) will make finding and sorting everything vastly easier.
Every experiment gets a unique identifier and this identifier follows the experiment everywhere: on your samples and culture plates, your lab book, your raw data folder, your analysis files, your images, your spreadsheets, etc.
The benefit of this is that everything stays findable and searchable. If you are looking at a graph two years later and want to know where the raw data came from, the experiment number should lead you back to the lab book entry, the protocol, the sample details, the analysis, and any notes you made at the time. If your experiment numbers are chronological, they also become a rough timeline of your PhD. It also means it’s easy to put all the files related to an experiment in the same place.
This sounds easy until you realise how easily things drift. You run a quick pilot experiment and do not give it a number because it is “not important”. But then, of course, it becomes important. Slowly, chaos enters the system. Take the time to maintain the system. Do not let chaos in. Number things. And of course, create an index somewhere obvious and easy to find so someone later (yourself or others) can come in and see what each experimental number means.
- Use consistent file names and terminology
This sounds like the same advice from the previous point, but it is not.
A good experiment numbering system should be paired with a consistent file naming system. A useful file name should tell you, at minimum, what the file is, when it was made, and what experiment or project it belongs to.
This may look excessive, but there are few things more satisfying than opening a folder and having the files automatically appear in chronological order, with their contents reasonably intelligible. By contrast, there are few things more demoralising than finding 12 files called some variation of:
new analysis
analysis final
analysis final final
analysis final use this
analysis final use this 2
analysis final actually use this one
Consider also the following example – when doing a Western blot and stripping the membrane to re-blot the same or a different protein on the blot, have you done Blot 2? Round 2? Reblot 1? Stain2? And if you run a new gel from the same sample is that Blot 2 as well? It doesn’t really matter what term you use, but you should define and stick with a specific language from the beginning.
 In each of my western blot experiment folders, ideally what you’ll find the protein quantification file (“002_Example Name_BCA Quantification”), which I know also contains the gel maps, then folders for all the images (one folder for 002_Example Name_Blot 1, with sub folders for 002_Expeirment Name_Blot 1_Round 1/2/3/etc for stripped and reblotted membranes, and a new folder for 002_Blot 2 from the same sample run on a new gel), then a file for the quantification output (“002_Experiment Name_Image Lab Quantification”) then a file for the graphs (“002_Experiment Name_Analysis”) and a powerpoint file to summarise everything (“002_Experiment name_Results Summary”). And in every other experiment that involves western blots, you’ll find files labelled the same way with the same type/stage of data in each.
(Ideally. I’m not perfect. But it’s pretty good).
This is about readability as much as it is about tidiness. It is about being able to go from a final figure back to the raw data without needing to rely on memory or vibes or lots of guessing and checking.
- Keep all your notes in one place
At the start of a PhD, it is easy to scatter notes and ideas everywhere. Some in a physical notebook. Some in Word documents. Some in the margins of PDFs. Some in emails to yourself. Some in random Google Docs. Some in the notes app on your phone. Some, tragically, only in your brain.
This is a mistake. Your brain is not a good long term storage environment.
Have one central place where your research notes live. This might be OneNote, Notion, Obsidian, Evernote, a carefully organised folder of Word documents. The specific tool matters less than the principle: your notes should be searchable, organised, backed up, and in the one place. It’s really annoying to have to search across multiple different apps and formats of files to be able to find the thing you were looking for.
I used OneNote extensively and found it especially useful because it allowed me to organise notes into sections, paste in images, annotate freely, and search text across notebooks. One particularly useful feature is optical character recognition, or OCR, which means that text in images can become searchable. This is surprisingly helpful because so much research documentation happens by hand: whiteboards, handwritten notes, microscope settings, protocol scribbles, posters, slides, reagent labels, plate maps, etc.
All my handwritten lab notes, plates, important reagent labels, etc. all get photographed and imported into OneNote, and become searchable with all of my other notes (the Apple iPhotos OCR is also, incidentally, extremely good, even with my questionable handwriting).
This note system is by no means neat and tidy, but it is organised and searchable so that years later when you need to find something, you can (and, if you followed step 2, you know what it should be called).
- Use a reference manager properly from day one
Your life will be made 1000x times better if you use a reference manager consistently from day one, with a good tagging system.
Zotero, Mendeley, EndNote, Paperpile — choose your fighter. I personally like Zotero because it is free, open-source, and has a tagging system I found extremely useful. But the important thing is not which reference manager you use. The important thing is that you use one consistently.
A reference manager is not just for inserting citations into papers and generating bibliographies, though this alone is enough reason to use one. It is also a memory system. Over the course of a PhD, you may read hundreds or thousands of papers. You will not remember them all. You will remember that there was “that paper about microglia and complement” or “that study with the weird tau result” or “that one review with the useful diagram”. Tags, folders, and notes make these papers findable again.
My recommendation is to tag papers by topic, method, model, disease, and possible future use. For example:
Diseases: AD, PD, FTD, etc.
Topic: autophagy, mitochondria, lysosomes, mitochondrial stress, heterogeneity, etc.
Model: human brain tissue, iPSCs, Cortical Neurons, Rodent Models, Primary Cells, etc.
Methods used: PFFs, IHC, scRNAseq,
Key Genes Mentioned: SNCA, BIN1, TOM20, etc.
Utility: Methodology, Introduction, Background, Discussion
Type of Paper: primary paper / review paper
Other Notes: Supports Hypothesis / Contradicts Hypothesis
The most useful thing about the tagging system is that when you search, you can combine them. Now you can search through all your saved papers and find all the ones that do scRNAseq in iPSC models; or all the review papers on PFFs related to Parkinson’s Disease; or all the papers that look at autophagy in human brain tissue in AD and mention BIN1.
Having tags for things that will be useful when you’re writing your introduction/methods/discussion/etc is also super useful. A future thesis-writing version of yourself will be immensely grateful if you can open your reference manager and immediately pull up the papers relevant to a chapter, argument, technique, or caveat. It’s also useful if you’re planning an experiment and looking for other papers who have used the same technique.
-
 Make figures as you go
Everyone says this. Everyone is right. Almost everyone ignores it anyway.
Make figures as you go. Not necessarily perfect publication-ready figures, but clean, labelled, interpretative figures that summarise what you did and what you found. Having them for lab meetings and conferences and such is useful but actually what is even more useful is the underlying clean datafile which combines all your different replicate etc. and has some stats properly done on it, that you can come back to later to make your final versions easily.
Figure-making takes a shocking amount of time. The graph itself takes plenty of time to format, let alone the surrounding work: cleaning data, choosing representative images, arranging panels, writing legends, checking labels, making sure colours and fonts are consistent, finding the right statistical annotations, and then trying to figure out how to export everything at 300 DPI.
Making figures as you go also helps you think. A figure is not just a visual output; it is an distillation of all the work you’ve done so far, and pushes you towards key decision points. Even if the figures later change, you will have a visual record of the project developing over time, and the underlying data will be tidy and ready for use. When it comes to writing reports, papers, talks, or your thesis, this is priceless.
- Have a centralised spreadsheet for everything
This brings me to the cell culture-specific section, though honestly the principle applies much more widely: spreadsheets are your friend. You don’t have to make an overly elaborate, colour-coded monument to procrastination like I have. But having a centralised document to coordinate what you have, where it is, what condition it is in, what has been done to it, and what can still be done with it, and when you want to do things, makes life a lot easier.
My spreadsheet includes
- A freezer stock spreadsheet with a line for every vial of cells I have ever frozen down, and further information on when I thawed them and how they turned out (this also means you can keep a running tally of how many vials of cells you’ve made, you know, for fun).
- A log of cell passaging, i.e. notes on how many cells I had every time I have passaged and counted cells, which makes it easier to predict in the future how fast certain lines grow and how many cells you can expect to yield after X days in culture.
- A huge calendar spreadsheet with days of the year going left to right and cell differentiations on each row. I can mark important dates on the calendar at the top (conferences, friends visiting, trips away, major events, etc.) and then time experiments to ideally avoid these, and not overlap too much with eachother too. Especially when working with differentiation protocols that are months long and predictable, knowing when your big treatment or harvesting or replating days are going to be weeks in advance can help you plan the rest of your life, or vice versa.
- A log of all my protein and RNA samples and cell lysates (which I did not do in my PhD but now do religiously). This makes it vastly easier to remember all the samples you have available, how much there is left of each, how well each sample turned out, and if you need some spare to do an extra experiment, what sample is going to be best to use. This requires a lot of upkeep but is extremely helpful.
- A page of all my plate maps for every plate of cells I grow, across all my experiments, which helps a lot in planning experiments and remembering later when sorting through microscopy files.
- A list of every experiment (numerical and chronological, of course) and what plates, lysates, samples, etc. are associated with each, and what stage each one is at (kind of like a massive Gantt chart), with a brief note about what the main outcomes of each experiment was.
There are many more possibilities (e.g. pages for calculating how to make up different kinds of media, lists of antibodies and other reagents and their catalogue numbers for easy reordering, but those are the main ones).Interim Thoughts
At this point this blog is ballooning out so I will take a pause after these practical notes and curtail the useful mindsets and practices into a part 2. Most of this advice is not super exciting (unless, like me, you really like spreadsheets). It does take a bunch of time and effort and won’t save you from failed experiments.
However, good systems make life easier in the long run, and PhDs are a marathon. They protect you from your own forgetfulness, make your work more reproducible, your writing easier, your planning more realistic, and your future self less lost and confused.
Set up systems. Use a reference manager and actually curate your collection. Make the spreadsheets. Write the templates. Track your samples. Back up your files. Taking the time is worth it! The work now when time is cheap will save you effort when time is short and you’re scrambling to finish. The person you will be three or four years from now, trying to write a thesis, finish a paper, respond to reviewers, apply for jobs, and work out what on earth happened in experiment 17 will thank you. Make current you the sort of person that future you will be grateful for.
Ajantha Abey
Author
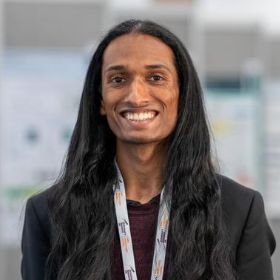
Dr Ajantha Abey is a Postdoctoral Researcher in the Kavli Institute at University of Oxford. He is interested in the cellular mechanisms of Alzheimer’s, Parkinson’s, and other diseases of the ageing brain. Previously, having previoulsy explored neuropathology in dogs with dementia and potential stem cell replacement therapies. He now uses induced pluripotent stem cell derived neurons to try and model selective neuronal vulnerability: the phenomenon where some cells die but others remain resilient to neurodegenerative diseases.